Real Estate Photography Tips: How to Shoot Listings That Sell
Professional listing photography generates 61% more views. This guide covers every real estate photography decision — camera settings, composition, lighting, room order, and the AI tools that maximize every photo after the shoot.
Listings with professional photography receive 61% more views than those with smartphone-only photos (Redfin, 2024). The gap between a listing that generates 40 enquiries and one that generates 8 is almost always visible in the first two or three photos.
This guide covers every real estate photography decision — before the shoot, during it, and after — including the AI tools that maximize photo performance without reshooting.
Before the Shoot: Preparation Is 60% of the Result
The photos that underperform are usually the result of decisions made before the photographer arrived.
Staging and Preparation Checklist
Every room should be photo-ready before the photographer sets up. This takes 60–90 minutes and produces dramatically better source material.
Every room:
- All personal items removed or stored out of frame
- Power cables hidden or taped flat to walls
- All lights tested and working — replace blown globes
- Floors clean and clear of all items
Living areas:
- Cushions fluffed and arranged
- Throws draped naturally (not folded)
- Coffee table cleared to 2–3 styled items
- TV off and screen clean
Kitchen:
- Countertops cleared to 3–4 styled items
- All fridge magnets and personal items removed
- Sink completely clean and dry
- All lights on including under-cabinet
Bedrooms:
- Bed made hotel-quality
- Personal items off all visible surfaces
- Wardrobes closed
Bathrooms:
- All personal toiletries removed, replace with one quality soap dispenser
- Fresh white towels
- Toilet lid closed
Exterior:
- Driveway clear of vehicles
- Bins moved out of frame
- Lawn and garden tidy
- Pathways and driveway swept
The agent takeaway: An agent who briefs vendors on preparation with this checklist produces better source photos than one who shows up and works with what's there. Better source photos mean less AI enhancement needed and higher final listing performance.
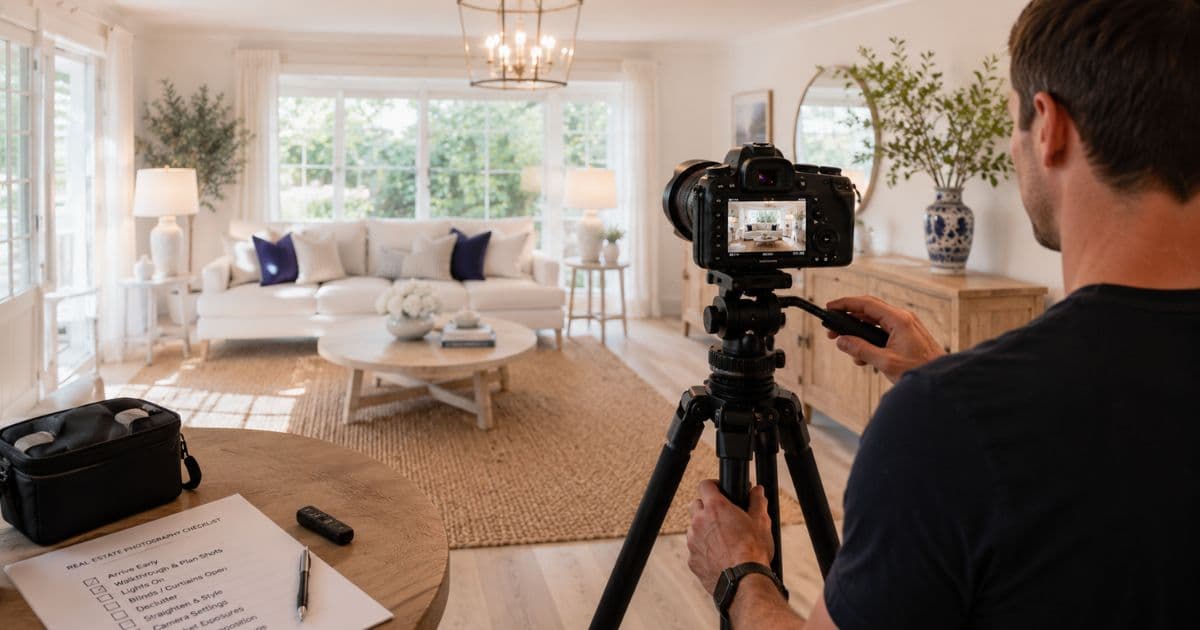
Equipment: What Actually Matters
A $5,000 camera with poor technique produces worse results than a $500 camera used correctly.
Camera: A full-frame mirrorless or DSLR (Sony A7 series, Canon R series, Nikon Z series) produces the cleanest results. For agents shooting their own listings: a modern flagship smartphone (iPhone 15 Pro, Samsung S24 Ultra) in wide mode with good natural light is entirely acceptable.
Lens: A wide-angle lens (16–24mm on full-frame, 10–15mm on crop sensor) is the most important investment for interior photography. The goal: capture the full room, including ceiling and floor, in a single frame from a corner position.
Tripod: Non-negotiable for interior photography. Handheld interiors at the slow shutter speeds needed for good exposure produce blur. A stable tripod also enforces consistent framing across all rooms.
Flash / Speedlite: Optional. Professional photographers use off-camera flash for window pull (balancing interior and exterior exposure). For agents shooting their own listings: shoot during the brightest part of the day with all room lights on and rely on AI enhancement to correct exposure.
Camera Settings for Real Estate Photography
Most real estate photography is shot in Aperture Priority mode — here's why.
Aperture: f/7.1–f/11. This range provides sufficient depth of field to keep all furniture in focus while eliminating the softness at wide apertures.
ISO: As low as possible — ISO 100–400. Higher ISO introduces noise (grain) that reduces image quality. If the room is dark, use a tripod and slow the shutter speed rather than increasing ISO.
White balance: Set to the dominant light source in the room. "Auto" white balance works acceptably for most rooms, but manually setting to "Daylight" or "Cloudy" for naturally lit rooms produces more consistent, warmer results.
Exposure bracketing: Professional real estate photographers often shoot 3–5 exposures of each composition (underexposed, correct, overexposed) and blend them in editing. For agents: shoot the best single exposure and use Homai's Enhance Photo tool to correct and improve it automatically.
Composition: The Rules That Make Rooms Look Larger
Where you position the camera determines how large the room appears in the photo.
Shoot from corners. The corner of a room gives the widest view of the space, captures two walls, and creates the diagonal lines that suggest depth. It's the standard starting position for every room.
Camera height: 1.0–1.2 metres. This is chest height, slightly lower than eye level. It's the height that makes furniture look correct — too high and the room looks like it's seen from above, too low and the ceiling dominates.
Shoot both ways in each room. In a bedroom, shoot from the corner facing the bed, and from behind the bed facing the entry. Use whichever composition shows the room at its best.
Include the ceiling and floor. The full height of a room in frame is what communicates the room's volume. Cropping the ceiling makes rooms feel lower.
Level horizon lines. Walls that lean or floors that tilt make photos look unprofessional and are disorienting for buyers.
Lighting: The Difference Between Good and Great
Turn everything on. Then add more.
Use all available light. Every light in every room — overhead, lamps, under-cabinet, pendant — should be on for every shot. This includes lights that aren't visible in the frame.
Natural light matters most. Shoot rooms at the time of day when natural light is at its best for that specific room. North-facing rooms (in the Southern Hemisphere) are best shot on bright days. East-facing rooms in the morning, west-facing in the afternoon.
Avoid mixed color temperature. Warm artificial light and cool daylight in the same frame creates orange blotches near lamps and blue tones near windows. Where possible, close blinds partially to balance the exposure difference between inside and outside.
The window pull problem. The most common technical challenge in interior photography: the window is overexposed (white) while the room is correctly exposed, or the room is correctly exposed and the garden/exterior is visible through the window. Solutions: shoot with HDR enabled, bracket exposures and blend, or use Homai's Enhance Photo tool which handles window pull automatically.
Room Order: Which Rooms to Prioritise
Not all rooms carry equal weight. The listing's hero sequence matters.
Recommended shooting order (prioritise these rooms):
| Priority | Room | Why |
|---|---|---|
| 1 | Living room | The primary buyer decision room |
| 2 | Kitchen | The second most influential room |
| 3 | Master bedroom | Demonstrates the home's quality level |
| 4 | Exterior (front facade) | The listing's hero shot |
| 5 | Dining area | Open plan context |
| 6 | Outdoor / alfresco | Lifestyle signal |
| 7 | Remaining bedrooms | Support the story |
| 8 | Bathrooms | Clean, minimal, essential |
After the Shoot: AI Photo Enhancement with Homai
The best real estate photographers now combine technical shooting with AI post-processing. Here's the workflow.
Virtual Staging — for vacant rooms, add photorealistic furniture in any of 37 styles in ~45 seconds. The single most impactful post-shoot intervention.
Day to Dusk — convert the hero exterior to a twilight shot. Generates 66% more listing views than a daytime exterior (PhotoUp, 2025). Under $1 per image.
Sky Cleanup — replace overcast or grey skies automatically. Critical for exterior shots taken on cloudy days.
Enhance Photo — improve brightness, contrast, color accuracy, and resolution automatically. The AI handles window pull, mixed lighting correction, and upscaling in one step.
Erase Objects — remove any items that should have been moved before the shoot: bins, hoses, parked cars, appliances left on benchtops.
Transformation Video — generate a before/after reveal video from a room photo for social media content.
Frequently Asked Questions
Do I need a professional photographer for listing photos?
Professional photographers consistently produce better source material. But with proper preparation, good natural light, a wide-angle lens, and Homai's AI enhancement tools, agent-shot photos can perform at a professional level for standard residential listings.
What's the most important single photo in a listing?
The hero exterior shot. It's the first image buyers see in portal search results and determines whether they click through. A twilight/dusk exterior — generated with Homai's Day to Dusk tool — generates 66% more views than a standard daytime shot.
Should I use flash for real estate photography?
Off-camera flash improves window pull and overall exposure quality significantly, but requires skill to use well. For agents: maximize natural light with a tripod and use Homai's Enhance Photo to handle exposure issues in post.
How do I make rooms look bigger in listing photos?
Shoot from corners at 1.0–1.2m height with a wide-angle lens. Include ceiling and floor in the frame. Ensure all lights are on. Use correct furniture scale if staging.
Make Every Listing Photo Perform at Its Best
Virtual staging, sky replacement, day to dusk, object removal, enhancement — every AI photo tool for listing photography in one platform.
Related: AI Real Estate Photo Editing | Day to Dusk Real Estate Photography | What Buyers Look for in Listing Photos
Written by Homai
AI staging and interior design for real estate agents
Related articles
AI Real Estate Photo Editing
Every AI photo enhancement tool for listing photos.
Day to Dusk Real Estate Photography
How AI replaces the expensive twilight shoot.
What Buyers Look for in Listing Photos
Buyer psychology research applied to listing photography.
Try Homai
Maximize every listing photo with AI
Virtual staging, sky replacement, day to dusk, object removal — every AI photo enhancement for listing photography in one platform.